Monday, February 28, 2011

$2 steal

I have a love for all bird accessories and had to share this little lovely that I found at Michael's today. I took a half day at school to run errands and get things done and of course Michael's was a stop. 


Also, the giveaway winner for the flourish coasters is Ms. Caroline Sweatt! Email me your address and I will send them your way!


Hope everyone is having a wonderful Monday. Less than 2 weeks until Spring Break...yay!!!

- Lauren

Friday, February 25, 2011

GIVEAWAY: flourish coasters

I am working on opening the shop this weekend! To celebrate I thought I would giveaway some cute fabric coasters I made last weekend! 

The giveaway will close at noon on Sunday. 


2 coasters come in the set

How to enter the giveaway...
1. You have to be a follower of this blog 
2. Leave a comment at the bottom of this post and tell me what is your favorite morning pick me up. Are you a coffee or tea drinker, or neither?
3. I will chose a winner using random.org after noon on Sunday


Wednesday, February 23, 2011

sprucing up the sewing space

I was trying to spruce up my little sewing space and add some color to our white walls (one day I will be able to paint!) Anyways, I got these super cheap at JoAnns and used leftover fabric to put inside. I really love the way they turned out! Sorry for the shadow..James was not home and he is definitely the photographer in the family! 


If you are working on fun little projects I would love to see them! I made a super cute necklace this weekend and can't wait to share it later this week!

Saturday, February 19, 2011

elastic waist skirt tutorial

I posted about the elastic skirt I made a couple of weeks back. I wanted to share a tutorial with you guys so you can make one for yourself. I did a couple of things different when I made one for myself. 


1. Here are the materials you will need...
iron
fabric scissors
fabric marker
measuring tape
elastic (at the width you prefer..I used 1 1/2 inch)
1 1/2 - 2 yards of fabric(I got mine at City Craft in Dallas)
thread
a small amount of fabric for the pockets 
For the fabric measurements: I measured my natural waist and then a little less than doubled that number to figure out the width of the fabric I needed to cut. Several tutorials said to double the number, but I did not want the skirt to be really poofy, so I did a little less and was really happy with it. I measured 28in. So I cut 50in.

Then measure from your natural waist to a little above your knee (you can do shorter or longer based on what you like). I left a 1/2 inch bias for all of my measurements. Since I am new at this, I don't know if I need that much, but it works for me. 

For the pockets: I put my hand down and traced an extra inch around it to make sure the pockets would work for me. 


 Once you have cut and ironed all of your fabric you can pin your pockets 3 inches from the top of the waistline. You would want to have right sides of fabric facing together, but I chose to use solid fabric to make it easy since this was my first one to make. 

Sew your pockets on each side of the fabric.

Press the pockets back.

Place right sides of fabric facing together and make sure pockets are nicely lined up. You can pin the sides if you would like. Start sewing down the side of the skirt and sew around the pockets on both sides. 

When you are done sewing the sides of the skirt, you can press the seam with your iron. 

Now it is time to hem (my least favorite part). I folded the hem up 1/4 inch and pressed and then folded up another 1/2 inch and pressed. 

Once you have pressed your hem, go ahead and sew it. 

Now it's time to cut your elastic. Take your natural waist measurements and cut your elastic. Fold your elastic in half and sew the ends together. I reinforced the stitch 3 times to make sure it was sturdy. 

With right sides still facing together pin your fabric around your elastic. Your elastic is on the inside if you can tell in the picture. I first pinned the side seams on the elastic to make sure an equal amount of fabric was on each side. Remember there will be a lot of extra fabric. I put 4 pins on each side. 
Note: While you are sewing the waist pull the elastic so the fabric stretches completely straight on the elastic. This will allow for a very nice (and equal) gathering all around the skirt. I could not get a picture of this because both hands were full trying to do this part. 

When you are done, turn it inside out and ta-da you have your very own elastic waist skirt! You can belt it or wear it alone. Hope you enjoy! I would love to see pictures if you make one of your own!

Here is a pic of me with the hubby for our Valentines date. Hope everyone had a wonderful Valentines Day!
-Lauren 

Tuesday, February 8, 2011

a valentine's treat

I was perusing the internet looking for some yummy valentine's treats and came across some delicious and precious ideas that were just too cute to keep all to myself. 

Here goes...

I found this recipe on Tasty Kitchen...one of my absolute favorite sites! It is an extension of Pioneer Woman and has so many great recipes!

(photo courtesy of tasty kitchen)


I love the idea of cutting out brownies to decorate your cupcake! 

Brownie Heart Cupcakes
(photo courtesy of martha stewart)


I thought this one was super cute...
Instead of a box of chocolates, it is like a box of mini cupcakes! And if you do not like to deal with the mess of making this all homemade, the website actually calls for using a box mix. 
Mini Chocolate Cupcakes With Multicolored Frosting
(photo courtesy of martha stewart)

And if you are really brave...
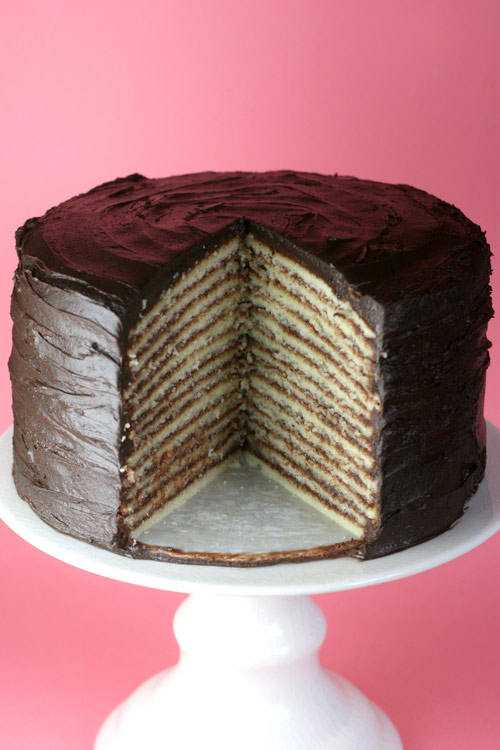
This one is from bakerella (which I love!). Some of her ideas seem a little difficult, but there are definitely some amazing recipes and great ideas! 
Fourteen Layer Cake

Hope you find a recipe you enjoy! Let's all cross our fingers for another snow day!

-Lauren

Friday, February 4, 2011

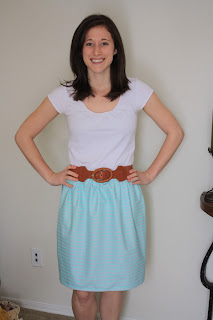
elastic waist skirt

Considering it is day number 5 of no school, I was able to tackle the elastic waist skirt this afternoon. Like I said yesterday, I found this tutorial through lullaby lubbock which linked to the blog that posted the original tutorial here


Here is the final product!

For the next couple of pics I belted it...which I prefer.
up close...

the outifit with the belt
can't wait until it is warm enough to go outside in this...

the pockets.


Overall, I thought it turned out great. I think in the future I will skip the pockets. At times they pooch out and that kind of annoys me. But I love the idea of having pockets, so maybe I will play around with it. Hope you enjoy the linked tutorial and would love to see pics of your skirt if you try it!


Stay warm!


Lauren 

Thursday, February 3, 2011

theme thursday: you can do it!

So I am starting a new weekly post called theme Thursday. Each Thursday I will pick a theme and share some ideas, links, pictures, and other fun things to go along with that week's theme. 

1. Make something: elastic waist skirts
I found this wonderful tutorial at lullaby lubbock (the most precious blog that my friend ruth introduced me to). I cannot wait to make one of these elastic skirts and you can do it too! 

Here is the tutorial. 
I just bought this cute fabric at city craft to use for my skirt.
 I would love to see the one you make!

FreeSpirit-McKenzie-DF71aqua

2. That DIY project you have been wanting to try....
Want some inspiration? Take a look at free enough to dance
Leah is an amazing woman who loves the Lord so much and is teaching in the Dominican Republic and exploring the world of do it yourself to make her new little place feel like home. I promise you will love reading about her journey and everything the Lord is teaching her. 

Here's a little peek at one of her amazing ideas...

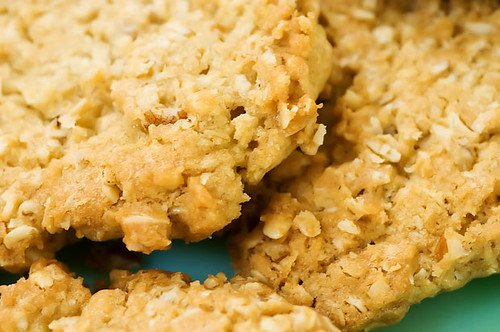
3. Make homemade cookies to warm you up during this freezing weather....


These are my absolute FAVORITE! I keep a roll of frozen dough in my freezer for any time I want to bring homemade cookies because they are that good. You can also change them up many different ways. Add some chocolate chips, nuts, cranberries...the pioneer woman always gives amazing recipes and great ideas to make them your own. They have become a Unthank family tradition (which means James and I eat them too much!) While you are on her blog peruse around the recipes...they are always entirely too delicious!

When you are done...take some to a friend. It is such a wonderful surprise to get a sweet gift from a friend and a great way to serve them!

4. Plan a fun date night with the hubs or a girls night with your girlfriends. 
James and I love date night and I also love a good girls night to sit and gab about anything girly! Cook something wonderful (check out pioneer woman) and plan it out. Either way it will be wonderful!

This is all I have for now. I hope this inspires you that you can do any of these things. I hope you get to use some of the links for inspiration, recipes, or that they somehow link you to another fun thing that you can do. My personal "I can do it" is going to have to be to finish the laundry and a few other chores that should definitely be done with an ENTIRE week off school!  

Wednesday, February 2, 2011

dresser redo

Hope everyone is enjoying one of these right now. Wish my fireplace was surrounded with all of this cuteness. 

Here are some pics of a dresser redo I did a couple of weeks ago. I had been meaning to paint and distress it for a long time but just had not gotten around to it. One Sunday, I just dragged it on the porch and sent my patient husband to the store for some more brushes and painted away! James is always so supportive of my projects (even when they are a little impulsive). I am still looking for some cute knobs (maybe anthropologie will put some on sale!) Hope you enjoy the before and after!

I know this pic is pretty bright. Here is the before. It is a really nice dresser, it just had some stains and needed some love...


Here is the after.I painted it a very light sage green (which is hard to tell in this photo). The outer rim of each drawer and the legs are distressed. Like I said it needs some new knobs, so I will post some pics when I find some I like. 


Hope everyone is enjoying snow day #2! Although I am tired of being couped up inside, it has been nice to get some things done and work on some projects! I have also really enjoyed spending time with James(and Jaxon of course). Stay warm if you are dealing with this weather! 

Tuesday, February 1, 2011

welcome to the simple sussie

Welcome to the new blog! I have decided to start this new blog along with a big cartel shop called "the simple sussie." My goal is to launch the shop in the next couple of weeks. During that time I will be working on products and posting about some fun projects I have been doing the last couple of weeks. 

The goal of the simple sussie will be for you to find a simple little treat for yourself, a friend, a gift, or anything at all! 

I will also use this blog for life updates like I did over at "the unthank update." Since the unthank update was mostly focused on crafting and sewing projects I thought I would combine it all here on the simple sussie. 

Go ahead and follow the blog. I will be doing a giveaway in the next week or so. I am looking forward to this fun project and hope everyone enjoys reading! I will be posting about a fun dresser re-do later this afternoon! 

Happy snow day!! 

Lauren